¶ Basics
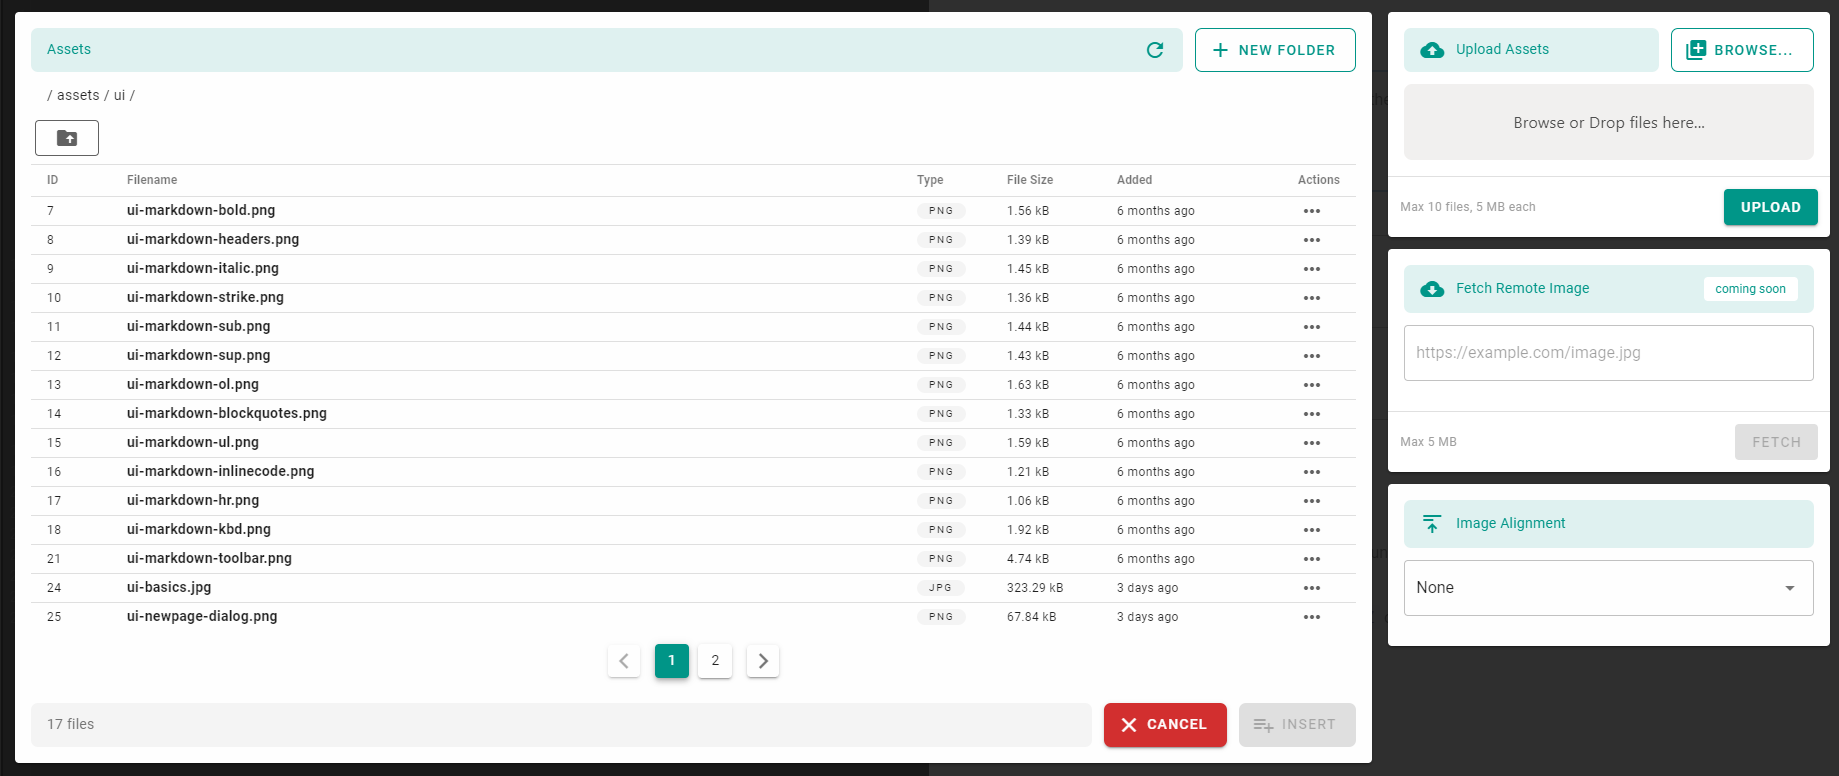
All editors have a button to open the Assets dialog. Refer to the documentation of each editor for more information.

The assets can be of any file type; images, documents, zip, etc.
Images will automatically be displayed as images while other file types will simply display a standard link.
¶ Upload an Asset
Use the Upload Assets section to upload new assets. You can either click on Browse... button, on the grey area just below or by drag-n-drop files onto the grey area directly.
Once ready, click the Upload button to initiate the upload for all files.
¶ Use an Asset
Select the asset you want to insert, then click the Insert button.
¶ Image Alignment
When inserting an image, you can also set a specic alignment using the Image Alignment dropdown menu (to the right of dialog).
- Left: Align to the left of the page.
- Centered: Align to the center of the page.
- Right: Align to the right of the page.
- Absolute Top Right: Display as a logo in the top-right corner of the page.
¶ Manage an Asset

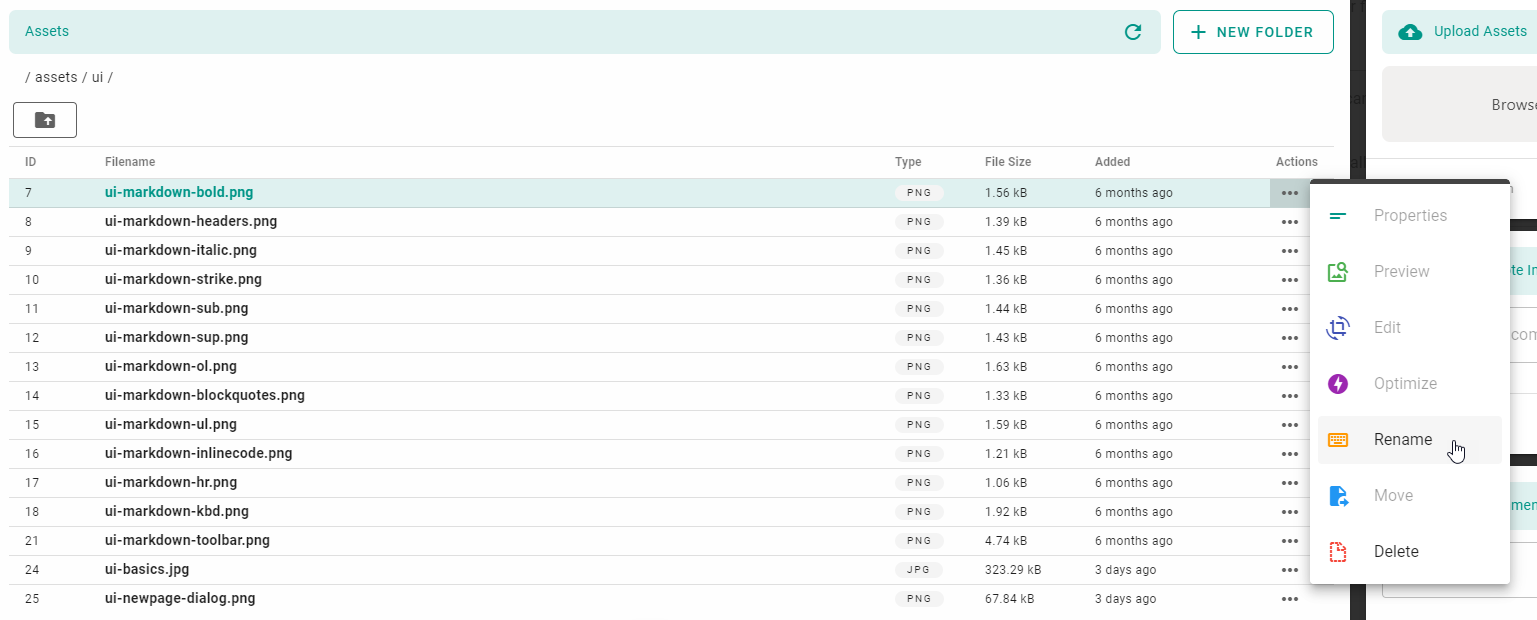
To perform any action on an asset, such as rename, delete or edit, click on the ... button to the right of the asset list item. A dropdown menu will appear with all possible actions.
Note that disabled actions are not yet available and are coming in a future release.
¶ Asset Folders
¶ Create an Asset Folder
Click on the New Folder button, located at the top of the assets dialog. Enter a new name that respects the naming restrictions listed below.
¶ Manage Asset Folders
-- Coming soon --
¶ Naming Restrictions
Folders must respect these naming rules:
- No spaces allowed.
- No uppercase latin characters.
- No special characters with the exception of dash
-and underscore_. - Must be at least 2 characters in length.
- Cannot consist of only latin letters (A-Z) in the pattern
ZZorZZ-ZZ(reserved for locales). - Cannot start or end with a special character.